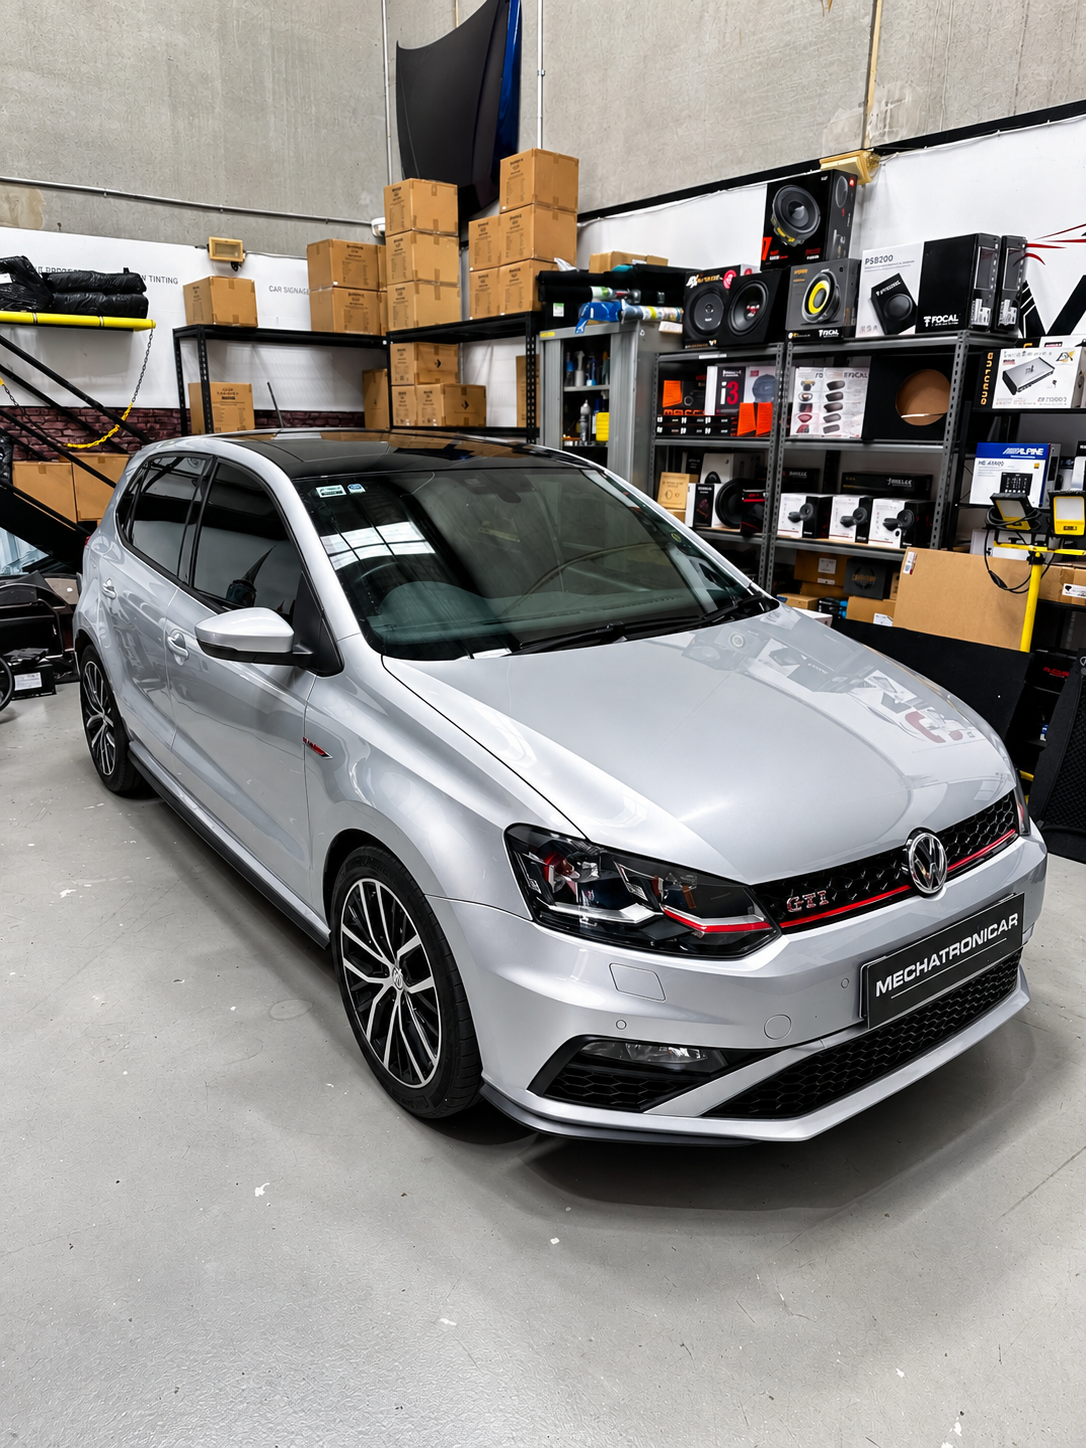
A complete sound transformation by MC Audio Australia, combining HELIX DSP technology, custom fabrication, STP acoustic treatment and an OEM-inspired installation.
A Small Car with Serious Audio Ambitions
When Jordan first contacted MC Audio Australia about upgrading his 2015 Volkswagen Polo GTI 6C, he already had a clear understanding of what he wanted.
Having experienced high-fidelity audio in his other vehicle, an SUV, Jordan wanted to bring a similar level of sound quality to his Polo, without compromising the practicality or original appearance of the car.

His initial equipment selection included a HELIX P SIX DSP ULTIMATE amplifier, HELIX COMPOSE Ci7 speakers, a dedicated HELIX subwoofer amplifier and his existing Hertz Mille PRO shallow-mount subwoofer.
As the project developed, the front speaker configuration was upgraded to the HELIX Ci7 range, with additional sound deadening, a HELIX CONDUCTOR controller and a custom-designed boot installation.
Our goal was straightforward: create a powerful, detailed and balanced sound system that could deliver a premium listening experience while maintaining the discreet, factory-inspired appearance of the vehicle.
But before installing a single speaker, we had a much more interesting challenge to solve.
1. Starting with the Most Difficult Part: The Custom Subwoofer Enclosure
Normally, a car audio upgrade begins with speaker installation or the amplifier system. For this Polo GTI, we decided to approach the project differently.
We started with the subwoofer enclosure.
The Volkswagen Polo GTI 6C has an unusual boot layout. Its battery is positioned underneath the boot floor, close to the spare-wheel area. Removing the space-saver spare wheel creates additional usable space, but the available depth and irregular shape make custom subwoofer installation challenging.
Jordan wanted to retain his Hertz Mille PRO MPS 300 S2 12-inch shallow subwoofer and was initially aiming for an enclosure of approximately 30 litres.
We particularly liked this subwoofer for the project. Its shallow-mount design offers an excellent balance between installation flexibility, bass performance and cost, making it an attractive option for vehicles where space is limited.
However, even with a shallow subwoofer, physical clearance remained our biggest challenge.

Multiple Measurements, Prototypes and Test Fits
Before the main installation, Jordan brought the vehicle to our Sydney workshop for measurements.
We inspected the battery location, spare-wheel cavity and available boot-floor height. From there, we developed an initial enclosure prototype.
A second visit allowed us to test-fit the design directly inside the vehicle.
During these checks, we identified a depth limitation of approximately 30–40 mm. We also explored whether a fibreglass enclosure could help us maximise the available space.
Although fibreglass can be extremely useful for irregularly shaped enclosures, it would not eliminate the minimum mounting depth required by the subwoofer itself.
We ultimately decided that the most practical approach was to raise the boot floor slightly, allowing us to create a custom enclosure while keeping the subwoofer concealed and retaining access to the battery.
This also provided an opportunity to integrate the amplifier installation beneath the new floor.
The objective was not simply to hide a subwoofer. It was to create an installation that looked like it belonged in the car from the beginning.

2. Testing the Enclosure Before Final Assembly
One of the fabrication steps we pay particular attention to at MC Audio Australia is checking our custom subwoofer enclosures before final installation.
Over the years, we've encountered cases where an enclosure was not completely airtight. Even a small air leak can introduce unwanted noises, especially when a subwoofer is operating at higher excursion levels.
That's why we prefer to test our custom enclosures before permanently integrating them into the vehicle.
For Jordan's Polo, we focused on the enclosure fitment, structural integrity and sealing before proceeding with the finishing materials.
For a compact sealed subwoofer system, the construction of the enclosure is just as important as the subwoofer selected.
A premium subwoofer deserves an enclosure engineered to support its performance.

3. Preparing the Polo: STP Sound Deadening and Acoustic Treatment
With the enclosure design underway, Jordan returned with the Polo for the main installation.
Our first major task was acoustic treatment.
Sound deadening is one of the most important foundations of a high-quality car audio system, particularly when upgrading to more capable speakers.
Thin automotive door panels can vibrate and resonate, while unwanted noise and panel movement can affect perceived bass definition and overall clarity.
For this project, we treated all four doors using specialised STP acoustic materials.

STP Sonora and Multi-Layer Door Treatment
We used STP Sonora in the door cavities as part of our acoustic insulation approach.
STP Sonora is designed for automotive door applications, combining sound-insulating layers with materials suited to the moisture conditions inside vehicle doors.
We also incorporated additional STP vibration-damping treatment, including the Platinum material specified for this build, across the appropriate door surfaces.
Our acoustic treatment focused on:
- Reducing unwanted door-panel vibration and resonance.
- Improving the acoustic environment behind the speakers.
- Minimising unwanted noise from the door structures.
- Providing a more stable foundation for the new HELIX speaker system.
The intention wasn't simply to make the vehicle quieter. We wanted the door structures to support the performance of the upgraded speakers rather than interfere with it.

4. Custom Speaker Mounting: Upgrading to HELIX Ci7
Once the door treatment was complete, we moved on to the new speaker installation.
Jordan's final configuration included upgraded HELIX Ci7 front speakers, with HELIX COMPOSE Ci3 coaxial speakers in the rear.
Rather than adapting the new speakers directly to the original Volkswagen mounting arrangement, we fabricated the required mounting adapters for the installation.
This is an important detail that is often overlooked.
Speaker mounting affects more than appearance. A secure, accurately positioned speaker helps reduce mechanical movement and improves the consistency of the installation.
We also took particular care with the wiring.

Dedicated Wiring for a Fully Active System
For this project, we installed our own dedicated speaker cabling.
In a high-performance audio system, the quality of the wiring, terminals and connections is an important part of long-term reliability.
We wanted a clean installation with properly routed cables and secure connections, especially because the new system was designed around fully active speaker control.
In an active system, individual speaker channels can be managed through the DSP instead of relying entirely on conventional passive crossover arrangements.
This gives us greater control over the sound through individual filtering, level adjustment, time alignment and equalisation.
With the HELIX Ci7 front stage and Ci3 rear speakers installed, the next stage was connecting everything to the amplification and signal-processing system.

5. HELIX P SIX DSP ULTIMATE: The Heart of the Audio System
At the centre of Jordan's build is the HELIX P SIX DSP ULTIMATE, a premium six-channel amplifier incorporating a 12-channel digital signal processor.
This combination gives us the tools to create a carefully controlled sound system rather than simply making the factory audio louder.
Our system design included:
| Component | Role |
|---|---|
| HELIX P SIX DSP ULTIMATE | Main amplification and digital signal processing |
| HELIX Ci7 front speakers | High-fidelity front soundstage |
| HELIX Ci3 rear coaxial speakers | Rear audio reproduction |
| HELIX AMPLIFY 201 DIRECT | Dedicated subwoofer amplification |
| Hertz Mille PRO MPS 300 S2 | 12-inch shallow subwoofer |
| HELIX CONDUCTOR | User control of DSP functions and sound profiles |
The dedicated HELIX AMPLIFY 201 DIRECT allowed us to provide separate amplification for the Hertz subwoofer, while the main DSP amplifier managed the remaining speaker channels.
This architecture was selected to provide detailed control over the different elements of the sound system.

6. Power Wiring, Signal Routing and HELIX CONDUCTOR Integration
Once the speakers were installed, we continued with the electrical side of the project.
This involved routing the power and speaker cables, connecting the amplifiers and preparing the wiring for the HELIX CONDUCTOR remote controller.
With the amplifiers located in the rear section of the vehicle, cable routing and protection were particularly important.
We wanted the installation to remain discreet, practical and serviceable.
The HELIX CONDUCTOR was another important part of the upgrade.
Jordan listens to a wide range of music, including drum and bass, and wanted the ability to adjust the subwoofer level and change sound profiles without connecting a laptop to the DSP.
We configured four controller functions:
- Red – Subwoofer Level
Direct control over the subwoofer output.
- White – Auxiliary Input Level
Reserved for control of an additional audio source, such as a future Bluetooth or auxiliary input.
- Blue – Rear Speaker Level
Allows adjustment of the rear speakers' contribution to the sound.
- Green – DSP Sound Profiles
Provides access to four stored DSP profiles, allowing Jordan to select different listening configurations through the controller.
This gives the driver far greater flexibility than a conventional amplifier installation.
7. Boot Sound Deadening and Hidden Amplifier Integration
With the main wiring routed and the custom enclosure prepared, we moved back to the boot.
Before positioning the amplifiers and subwoofer system, we applied additional sound deadening to the rear installation area.
This was especially important because the boot would house the custom enclosure and amplification system.
The acoustic treatment was designed to help control unwanted vibration and resonance around the subwoofer installation.
We then worked on integrating the equipment beneath the raised boot floor, with several priorities in mind:
- Conceal the subwoofer from everyday view.
- Incorporate the amplifiers into the boot installation.
- Retain access to the rear-mounted battery.
- Maintain a practical luggage area.
- Finish the raised floor using material selected to complement the factory Volkswagen trim.
The purpose of the custom fabrication was to make a significant audio upgrade compatible with everyday ownership.
A boot should still be usable for shopping, luggage and normal driving duties, even when it contains a serious high-fidelity sound system.
8. Bringing the System Together with DSP Tuning
The final stage of a system like this is where the individual components are brought together acoustically.
The HELIX DSP platform gives us the ability to work with speaker levels, crossover settings, equalisation, time alignment and listening profiles.
Jordan was particularly interested in different listening experiences, including a driver-focused presentation, a more centre-focused soundstage and a bass-oriented option for electronic music.
These preferences informed our approach to the DSP configuration.
With four profiles available through the HELIX CONDUCTOR, the system provides flexibility for different listening situations, while maintaining direct access to subwoofer and rear-speaker level controls.
This is one of the reasons we consider DSP integration so important in modern high-fidelity car audio.
The speakers, amplification, installation and acoustic treatment create the foundation. DSP calibration is what allows those elements to work together as a system.

The MC Audio Approach: Engineered Around the Vehicle
Jordan's Volkswagen Polo GTI is a great example of why every premium car audio project needs an individual approach.
We didn't start by removing the factory speakers.
We started by understanding the vehicle, its physical limitations and the client's expectations.
We measured the boot, developed an enclosure prototype, tested the fitment, reconsidered fabrication options and designed a solution around the rear battery.
Only then did we move into acoustic treatment, custom speaker mounting, dedicated wiring, amplifier integration and DSP configuration.
Every stage was approached with the same objective: deliver high-quality audio without unnecessarily compromising the vehicle's functionality or appearance.
For us, that's what a properly engineered car audio upgrade is about.
Looking for a High-Fidelity Car Audio Upgrade in Sydney?
At MC Audio Australia, we specialise in premium car audio installations, custom subwoofer enclosures, DSP integration, sound deadening and vehicle-specific acoustic upgrades.
Whether you drive a Volkswagen Polo GTI, a European performance car, a luxury SUV or an everyday vehicle, we can design a system around your listening preferences and the practical requirements of your car.
Our Sydney workshop works with premium audio technologies from HELIX, MATCH, BRAX, Focal, Hertz and STP, combining quality equipment with professional installation and custom fabrication.
Ready to take your car audio to another level?
Contact MC Audio Australia to discuss your next project.
MC Audio Australia | Mechatronicar
Unit 10 / 5–7 Bermill St, Rockdale NSW 2216
Phone: 0415 072 361
Website: www.mcaudio.shop